

Thanksgiving is over, which means it is officially CHRISTMAS TIME! Not that I haven’t been listening to Christmas music and daydreaming about decorating for a month, but now it’s “socially acceptable” to be doing that. And what better way to celebrate the start of the Christmas season than with a handmade ornament (or two, or three)?


I saw this tutorial on Spoonflower originally using their wrapping paper and immediately though “that would be fun to do out of fabric”! You can find the original tutorial here. My version is very similar, but with a bit more specific instructions (I thrive on specificity) and made out of fabric. These are great stash-busters and hostess gifts for holiday parties. Best part? Other than waiting for stuff to dry, they take maybe 30 minutes to make! So let’s get started, shall we?

*This post may contain affiliate links and we may earn compensation when you click on the links and make a purchase at no additional cost to you.
Fabric Danish Star Ornaments
Materials:
- 2 square pieces of cotton fabric (I used 5″)
- Terial Magic Spray
- Twine or some other string for the hanger
- Fabri-Tac Glue
- Scissors
- Marking Pen and Ruler (optional, but helpful)
How to Make the Thing
1. Soak your two fabric squares with Terial Magic. This stuff is like starch on steroids (is it starch? I don’t actually know). It will turn a floppy piece of fabric into stiff, foldable, paper-y material. This is what makes it so that we can create our danish stars without any other stabilizer or interfacing. You’ll need to spray the pieces really well to fully soak them. You can do this either in a sink or bowl of some sort like the bottle suggests. I actually used a paper plate and I’m just going to keep gunking that up until it is too gunky to use anymore, rather than getting any of my sinks or bowls all sticky.
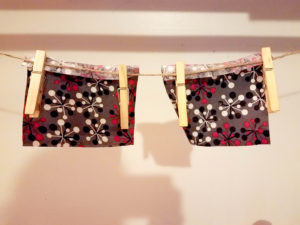
2. Once your fabric is fully saturated, hang your pieces to dry. I made a little makeshift clothesline above my ironing board, and put my paper plate beneath them to catch any drips. Let your pieces dry until they are just damp. If you walk away and forget about them (like I did) and they dry completely, don’t fret! Your project isn’t ruined. Just spritz the pieces with some water to re-activate the Terial Magic (but not too much).

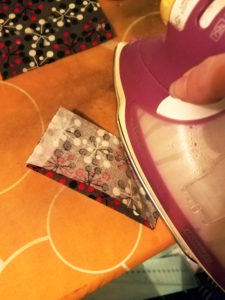
3. Iron your pieces of fabric. You really want to make sure your pieces are just damp and not wet for this part. If they are too wet, the Terial Magic sticks to the bottom of your iron and you get these ugly glue spots left on your fabric. Not fun. When damp, the iron will finish drying your piece, and when you’re done you’re left with a perfectly stiff piece of fabric. It’s really cool!
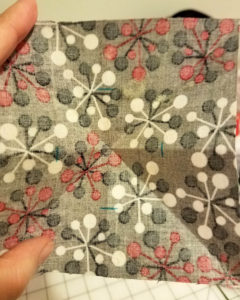
4. Take one of your squares and fold it in half diagonally, wrong sides together. You can press the crease into place with your fingernail or another scoring tool, or you can iron it for a little extra oomph. I tried both ways and didn’t find that one was necessarily better than another. Unfold the piece.

5. Fold the square in half diagonally the other way, wrong sides together. When you unfold, you should have an “X” going through your square.
6. Now fold your square in half lengthwise, right sides together, pressing the crease well. Unfold.
7. Fold your square in half lengthwise the other way, right sides together. Unfold. You should now have an “X” and a “+” running through your square.
8. Repeat steps 4-7 on the other square of fabric.
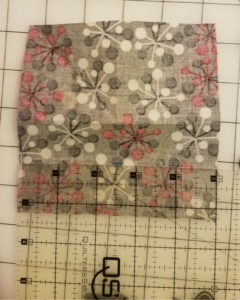
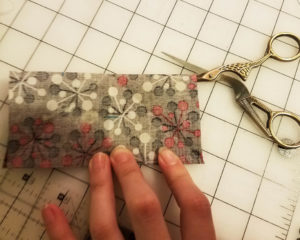
9. Make a cut about halfway to the middle on each of the straight creases (so all the legs of the “+”). If it helps, you might want to measure where halfway is and make a mark. For a 5″ square like I used, I measured in 1 1/4″ from each edge, and made a little mark on the wrong side of my material before cutting, just to make sure everything was uniform.

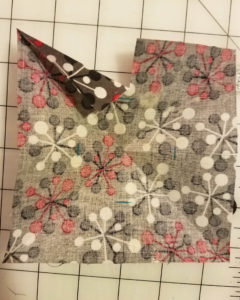
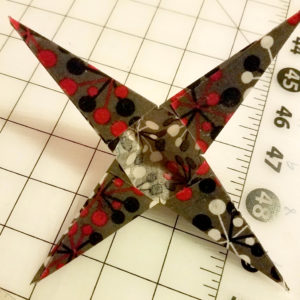
10. Fold your straight edges down to meet your diagonal creases. You will have two folds on each corner, creating a sort of 4-pointed star shape. Do this for each corner on both squares of fabric.

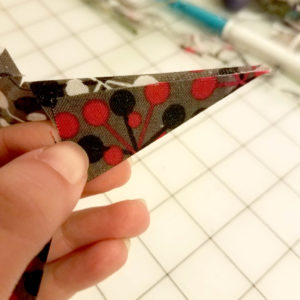
11. Grab your Fabri-Tac, we’re gonna start gluing. Usually I prefer to sew whenever I’m working with fabric, but it just didn’t make sense for this project. If I’m forced to glue fabric, Fabri-Tac is the stuff to use. This is a permanent-bonding, pliable glue meant for fabric. It’s a little bit like super glue, so try to avoid getting it on anything you don’t want glued! Take one of your folded corners, and overlap the two pieces. Your crease will create a 3D shape. Use your Fabri-Tac to glue the top layer to the bottom layer. You might have to hold it in place for just a moment before it really sticks, but it doesn’t take very long.
12. Repeat step 11 for the remaining corners on both squares.
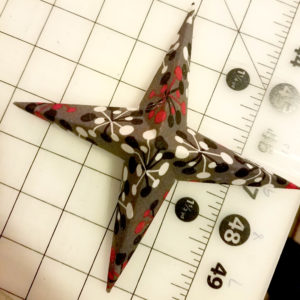
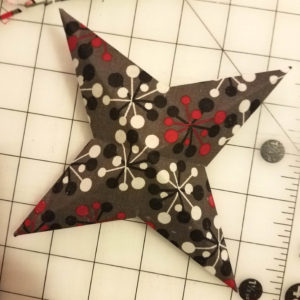
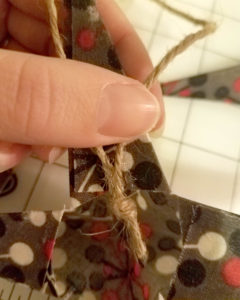
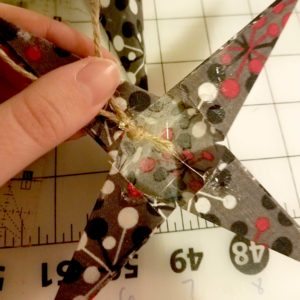
13. You should now have two 3-dimensional 4-pointed stars! Grab your string or twine or whatever you want for the hanger, and measure out a good length so that it can fit around your tree branches (mine was probably 10-12″ long). Create a loop and tie a knot at the loose ends. This will help hold the loop shape while your glue dries, and keep it from slipping out of your ornament later down the road. Decide where you want your hanger to go and put a dab of glue there. Position your loop so that the knot hangs down into the open part of the star, and glue in place. You’ll have to hold the loop steady while the glue begins to dry so that it doesn’t fall out of place.
14. Put a dab of glue on the corners of the opening of one of your star pieces. Offset your points, and press your two halves together, flat sides facing.

15. Let the glue dry, and you’re done! Admire your beautiful star.


Until next time,
Audrey

One thought on “DIY Christmas Ornament: Fabric Danish Stars”
Love this!!